


3.3 THROUGH-HOLE AND WIRE SOLDERING TECHNIQUES
Overview
Through-hole and wire soldering are fundamental skills used in electronics assembly and repair. This lesson introduces the basic process of creating reliable solder connections between components, wires, and connectors. To begin, let us first define and understand the concept of through-hole soldering.
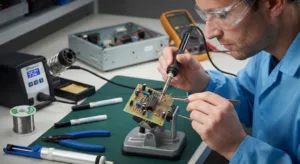
Basic through-hole soldering
Through-hole soldering (THT) is a method of assembling electronic components in which the component leads are inserted through holes drilled in a printed circuit board (PCB) and then soldered to copper pads on the opposite side of the board.
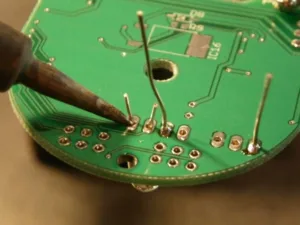
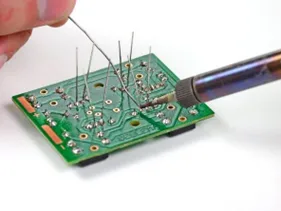 Figure: Through-hole soldering
It is one of the fundamental soldering techniques that an electronics repair technician should understand, particularly when working with older equipment, prototypes, power components, connectors, and components that require strong mechanical attachment.
A basic through-hole soldering process involves:
- Insert the component into the correct PCB holes.
- Secure the component so it remains in position.
- Heat the component lead and PCB pad with the soldering iron.
- Apply solder to the heated joint.
- Allow the solder to flow around the connection.
- Remove the solder and then the soldering iron.
- Allow the joint to cool naturally.
- Inspect the finished joint.
The aim is to create a clean connection between the component lead and PCB pad without applying excessive heat or solder.
Wire soldering
Wire soldering is the process of joining a wire to another wire, a PCB pad, or an electronic component using solder. The main goal is usually to create a strong electrical connection between conductors.
For example: Joining two wires together and connecting a wire to a terminal or component lead
When soldering wires you can use the following approach:
- Strip an appropriate amount of insulation.
- Prepare and clean the wire.
- Tin the wire if necessary.
- Heat the connection.
- Apply solder to form the joint.
- Allow it to cool before moving the connection.
- Insulate the connection where required.
For permanent repairs, appropriate insulation such as heat-shrink tubing can help protect the connection.
Connector soldering
Connectors should be held securely while soldering. Ensure that each wire or terminal is connected to the correct position according to the circuit or connector specification. Incorrect connections can cause malfunction or damage when the circuit is powered.
Safety reminder: Do not hold wires or components close to a hot joint with your fingers. Use appropriate tools when necessary.
Professional tip: Heat the joint rather than simply heating the solder. When the joint is hot enough, the solder should flow smoothly over the surfaces being joined.
Common mistake
Applying solder directly to the soldering iron tip and transferring it to the joint can result in poor wetting and weak connections. Heat the joint properly and feed solder to the joint.
Summary
In this lesson, you learned the basic techniques for soldering through-hole components, wires, and connectors. Proper heating, solder application, component preparation, and inspection are essential for producing reliable connections.

You may also like

Nyereka Tech and Tumba College Explore Opportunities for Collaboration

The Launch of our IoT Innovation Hub